

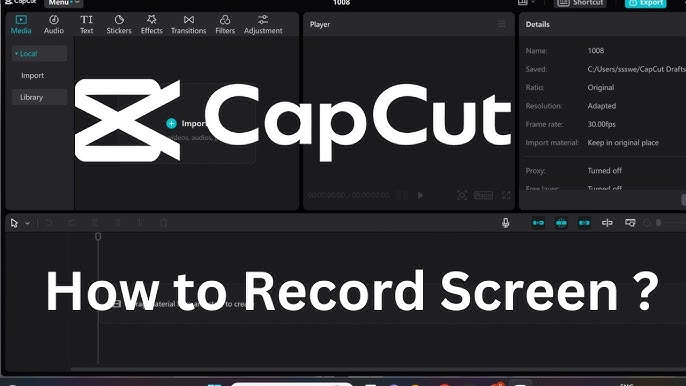
capcut screen recorder mac. If you’re looking to enhance your video editing skills with CapCut on your Mac, you might find yourself in need of a reliable screen recording solution. While CapCut does not offer a built-in screen recorder for Mac, there are simple methods to capture your screen effortlessly.
This guide will walk you through easy setup and usage tips, ensuring you can efficiently record your screen while using the CapCut screen recorder for Mac. Whether you want to create tutorials or share gameplay, mastering these techniques will elevate your content creation process.
Menu pricing varies by restaurant. Check the menu or website for specific prices. Contact the restaurant directly for accurate information.
Table of Contents
Using macOS’s Built-In Screen Recorder
To start screen recording on your Mac, press **Shift + Command + 5**. This shortcut opens the screen recording toolbar. From here, you can choose to record the entire screen, a selected portion, or a specific window.
Once you’ve chosen your preferred recording area, click “Record” to begin. To stop recording, click the stop button in the menu bar, or press **Command + Control + Esc**. The recorded file will be saved automatically, making it easy to integrate into CapCut for further editing. This method is quick and leverages the built-in capabilities of macOS.
Configuring Screen Recording Settings
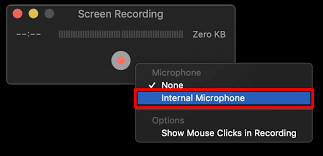
Before starting your screen recording, you can customize various settings to fit your needs. Click “Options” in the screen recording toolbar to choose where your recordings will be saved. You can also set a timer for 5 or 10 seconds, allowing you to prepare before the recording begins.
Additionally, you can enable or disable microphone audio to add voiceovers. If you want visual feedback, choose to show mouse clicks in the recording. These settings ensure you capture exactly what you need, optimizing your screen recording experience for seamless integration with CapCut.
Using QuickTime Player for Screen Recording
To record your screen with QuickTime Player, start by opening the application from your Applications folder. Next, navigate to **File > New Screen Recording**. This will bring up the screen recording controls.
Select your desired recording area and click the red record button to begin. If you need to stop the recording, click the stop button in the menu bar or press **Command + Control + Esc**. QuickTime Player offers a straightforward and user-friendly way to capture your screen, perfect for those who prefer a built-in macOS solution.
Integrating Screen Recordings into CapCut
Once you have your screen recording file, open CapCut and start a new project. Click “Import” to add your screen recording to the media library. Drag the file from the library to the timeline at the bottom of the screen.
You can now trim, split, and arrange the screen recording as needed. Use the various editing tools in CapCut to enhance your video, such as adding text, transitions, and effects. With your screen recording integrated, you can create professional-looking content directly within CapCut, making your editing process both smooth and efficient.
Editing Screen Recordings in CapCut
After importing your screen recording into CapCut, begin by dragging it to the timeline. Use the trim tool to remove any unwanted sections. Split the recording into multiple clips if needed for better organization. Apply transitions to ensure smooth shifts between clips.
Enhance your video by adding text overlays, stickers, and effects from the toolbar. Use filters to adjust the video’s look and feel. Fine-tune the audio by adjusting levels or adding background music. Lastly, preview your edits to make sure everything flows seamlessly. With these tools, CapCut makes refining your screen recordings simple and effective.
Advanced Screen Recording with Third-Party Tools
For more advanced screen recording features, consider using third-party tools like OBS Studio or ScreenFlow. OBS Studio offers extensive customization with various plugins, perfect for complex setups. ScreenFlow, on the other hand, combines screen recording with powerful editing features, streamlining your workflow.
Both tools provide high-quality recording options, including multiple audio tracks and adjustable frame rates. They also support live streaming, making them versatile for various content creation needs. Additionally, these programs offer more control over file formats and compression settings, ensuring your recordings maintain optimal quality. Transitioning to these tools can significantly enhance your screen recording capabilities.
Optimizing Screen Recording Quality
To optimize screen recording quality, begin by ensuring your Mac’s display settings are at their highest resolution. Close unnecessary applications to free up system resources, reducing the risk of lag.
Additionally, choose a high frame rate for smoother visuals, typically 30 or 60 FPS. Adjust the recording area to capture only what’s essential, minimizing file size. For audio clarity, use an external microphone. Finally, save your recordings in a high-quality format, such as MP4, to maintain visual fidelity. These steps will help ensure your screen recordings are crisp and professional, ready for editing in CapCut.